how to formate hard disk VIA CMD
Part 1- How to Clean Hard Drive Using DiskPart
Before learning the steps for cleaning the drive, let’s first understand what does DiskPart clean do? When you use the “clean” command in Diskpart, the utility software will clean the selected disks and information from the hidden sectors. All the stored data gets deleted, and you can’t undo it. It is recommended to take a backup first if there is some important data in the drive.
The time taken by the complete process depends on the disk size. To clean the drives follow the following steps:
Step 1- Open Command Prompt
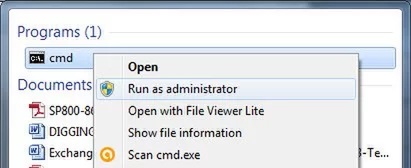
Search command prompt, right-click, and run it as an administrator.
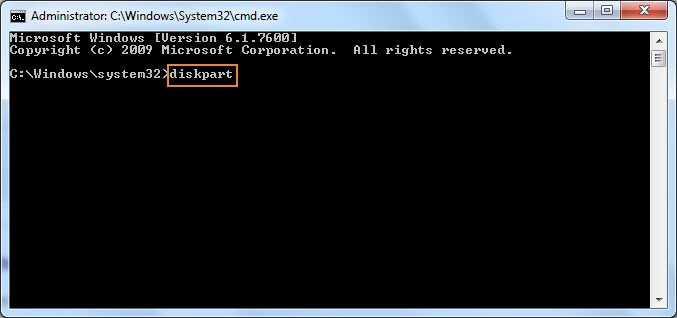
Step 2- Type diskpart
Type the command as mentioned above and press ‘‘Enter’’ to launch DiskPart.
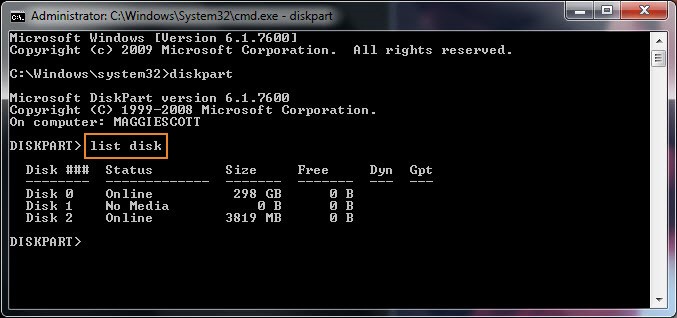
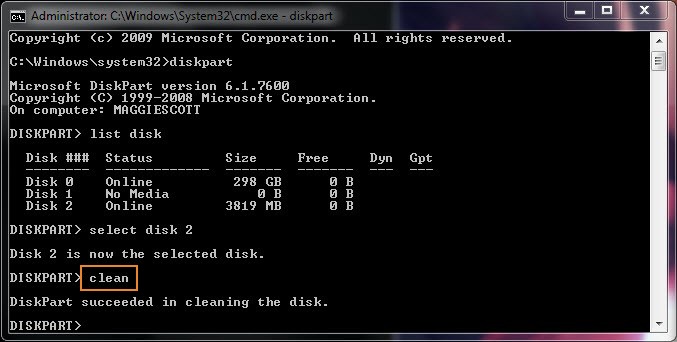
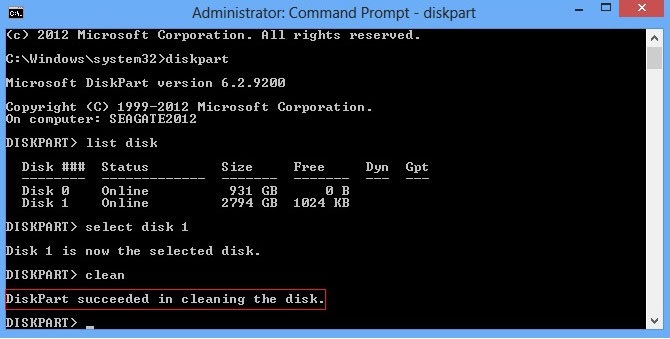
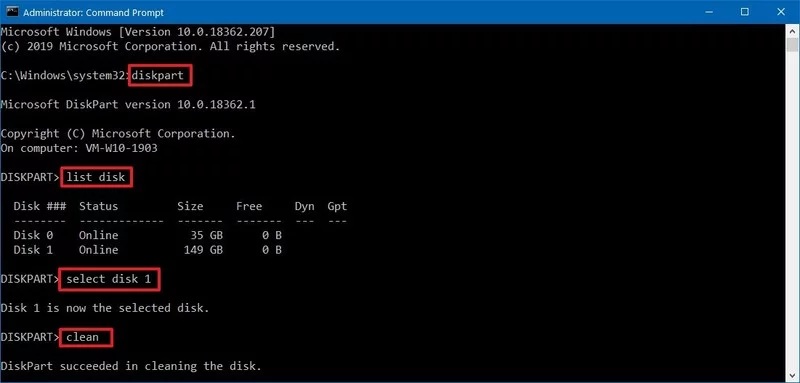
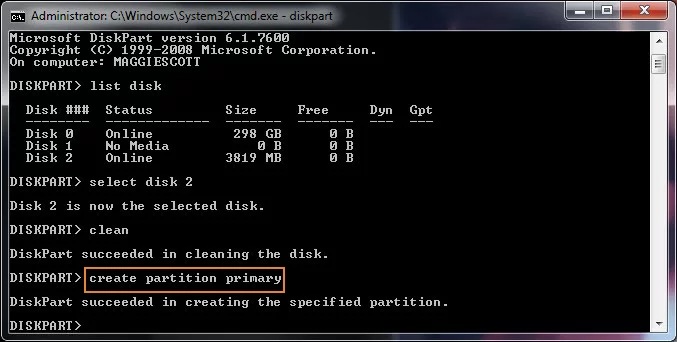
Step 3- Type list disk
The command will list all the drives that are available with the computer. After typing the command, press ‘‘Enter’.’
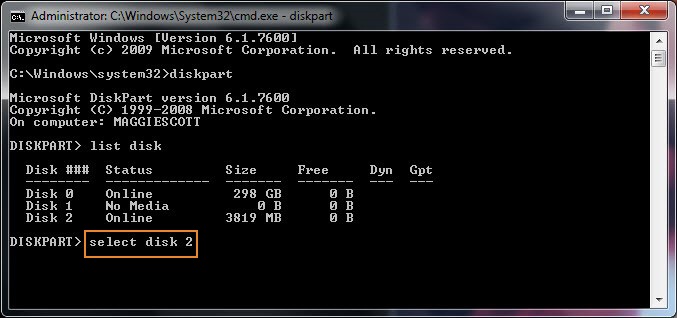
Step 4- Select the Drive by typing select disk *
The * mentioned in the command needs to replaced with the drive number that requires cleaning. Make sure you put the right number else you will end up cleaning the wrong drive.
Step 5- Type clean
The “clean” command will wipe out your required hard drive. Press ‘‘Enter’’ after typing it. It will clean up all the files and folders of the drive permanently.
Step 6- Close the Command Prompt after Successful Completion of Disk Cleaning Once the cleaning process completes, the command prompt will show the message that DiskPart cleaning is successful. Close the window from the button located up in the right corner.
Now you can reinitialize, partition and even format the cleaned drive.
Part 2- How to Format Hard Drive Using Command Prompts
While formatting a hard drive, you can clean both storage media- internal as well as external. But before beginning the formatting, you need to complete the cleaning of the drive first. The steps are the same as explained above. Once the disk cleaning is successful; you can continue with the formatting of the drive.
To understand how to format using DiskPart look for detailed steps below:
Step 1- Open the command prompt and run as administrator.
Step 2- Type diskpart and press ‘‘Enter’.’ It will launch the DiskPart.
Step 3- Type list disk to let the Diskpart list all the drives of the computer.
Step 4- Select the required drive by typing select disk *, here * is the number of the drive that will undergo formatting.
Step 5- Clean the files and folders on the selected drive using the clean command.
Step 6- Type list disk and press ‘‘Enter’’ to confirm the drive that needs to be formatted is still selected.
Here the output that comes out has an asterisk (*) before the selected drive.
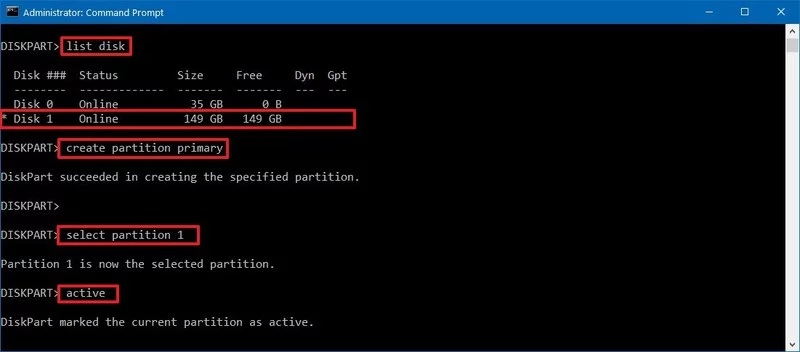
Step 7- Create a new partition by typing create partition primary and press ‘‘Enter’.’
Step 8- Select the created partition and press ‘Enter’ after typing the command select partition 1.
Step 9- Type active so that selected partition comes in an active state. Press ‘Enter’ after that.
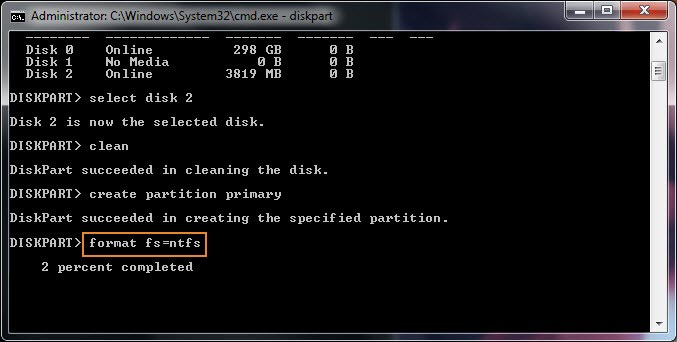
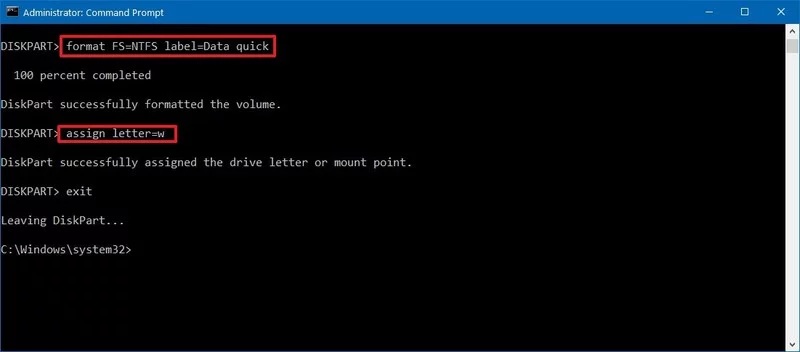
Step 10- Format the drive with the command format fs=ntfs. Press ‘Enter’ to begin the process.
Step 11- Assign a letter to the drive, to make it available in the File Explorer and then exit.
Press ‘Enter’ after typing assign letter=*, type your preferred letter in place of * that you want to assign to the partition.
Then to exit the DiskPart, type exit and ‘Enter.’
After completing all these steps, the drive is available at File Explorer. You can now start storing files on the drive.
Part 3- How to Delete Hard Drive Partition Using DiskPart
Sometimes for better management, you need to create more free space by deleting partitions. You also want to delete them because you don’t require them anymore or it has become damaged or corrupted. Follow the listed steps to delete the partition with DiskPart.
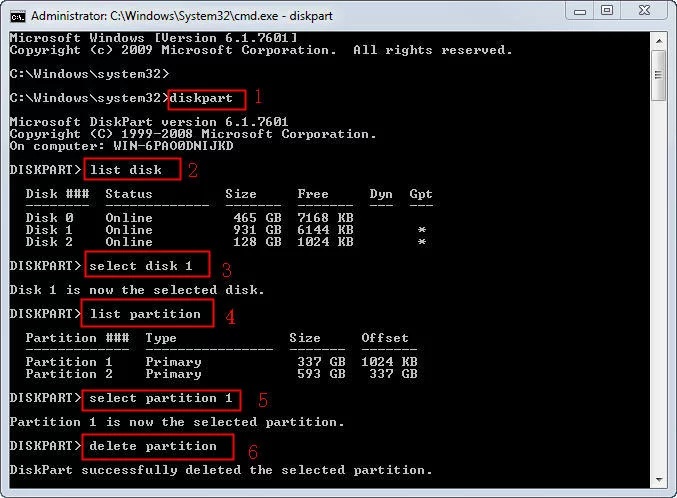
Step 1- Launch DiskPart in command prompt by typing diskpart. Press ‘Enter.’
Step 2- Type list disk and then press ‘Enter’ to list down all the available partitions.
Step 3- Select the disk to delete your required partition. Type select disk *, (*) is the disk number. After typing the command press ‘Enter.’
Step 4- Type list partition and then ‘Enter’ to view all the partitions.
Step 5- Now select the partition to be deleted by typing select partition *, again * here is the number of the partition. ‘Enter’ after typing the command to execute it.
Step 6- Now delete the partition by typing delete partition and begin the deletion by pressing ‘Enter.’
If the dynamic disk is in use, use the delete volume command for deletion process.
Part 4- What are the DiskPart commands?
DiskPart is a command-line tool that does disk management with a simple Command Prompt. You can do disk listing, partitioning, and even deletion of partitions with this tool. There are several DiskPart commands that are used to execute these functions.
The tool first came in Windows XP, and now it is available on almost all operating systems of Microsoft- Windows 2000, XP, Vista, 7, 8, and 10. Before initiating with Diskpart commands on Command Prompt, it is necessary to make a list and then focus by selecting an object. In this way, DiskPart commands will act on the focused object.
As Diskpart gets loaded on the Command Prompt, let’s understand a little about it. Command Prompt, also known as cmd, is referred to as command-line interpreter. It is available in all operating systems. The program allows you to ‘Enter’ and execute commands. As the mouse operates the buttons and menu of the graphical user interface; in the same manner, cmd uses command ‘Enter’ed from the keyboard in the form of text. The ‘Enter’ed commands are then converted into operating system understandable functions. Windows Command Processor is the official name of the Command Prompt. It is also known as command shell, cmd prompt and is also popular as cmd.exe that is with its file name. At times it is even referred incorrectly as DOS prompt or even MS-DOS. Though the Windows program – Command Prompt has many MS-DOS abilities but calling it, MS-DOS would be incorrect.
You will be using the platforms like DiskPart and Command Prompt for disk formatting. It is the process of configuring storage mediums like a flash drive and hard disk drive. During the formatting process, any of the documents or files that are already saved on the drive gets deleted. Usually, it is done before the installation of the operating system, and many times, it is also required for creating an additional storage space too.
Note: Your stored data gets erased when you format drive using cmd. Though it can be retrieved by using the recovery software, taking a backup is still advised. It allows you to save a copy of your data at a secure place for uncertain situations like drive corruption, formatting, accidental deletion, etc.
Part 5- DiskPart Format Command Options
DiskPart format command that runs on command prompt is used for formatting internal and external storage mediums of hard drives. The command is available in all Windows operating systems like Windows 10, 8 7, Vista, XP and in other older versions too. You can use it to deal with unlocked files means the files that are not currently in use. However, the syntax for the command differs from one operating system to another.
The format command syntax is as following:
format drive: /* /fs:file-system /r:revision /d /v:label /p:count /?
Here * refers to q, c, x, and l
Now understand the syntax in detail:
- drive:
- /q
- /c
- /x
- /l
- /fs:file-system
- /r:revision
- /d
- /v:label
- /p:count
- /?
You will write here the letter that represents the drive or the partition for which you require formatting.
It represents drive will undergo DiskPart quick format without searching a bad sector.
It will enable compression of folder and file. The option is available only when the drive is being formatted to NTFS (New Technology File System). It is a primary file system that is used in Windows 10, 8, 7, Vista, XP, 2000, and NT operating system.
If there is the requirement to dismount the drive before formatting, then this command is used in the format.
While formatting with NTFS, the command is used on dedupe-enabled drives that consist of files with size more than 100GB.
You will add the file system to which you want the format the drive. The file systems can be FAT, exFAT, FAT32, UDF or NTFS
It is used to focus the formatting to specific UDF version. The options include 1.02, 1.50, 2.00, 2.01, and 2.50. If you don’t specify any revision, by default it will take 2.01 version. When you are using /fs:udf only then you can use /r: command.
When formatting is done with UDF v2.50 only then this command can be used to duplicate metadata.
It is used to specify the volume label. If you have not mentioned it before formatting, the systems will enquire about it after the completion of the process.
It will write zero once to all sectors of the drive. If you specify the count, it will write some random number on the drive, as many times as you mention. The random number writing will start once the zero writing completes.
/p cannot be used with /q.
It is used to show help for the several options of commands.


Comments
Post a Comment